How To Use Minelab XChange 2 for EDITING - Illustrated Tutorial, page 9
Select Type of Tone ID Profile
(...CONTINUED from Previous Page)
The "Tone ID Profile" type for my "Coins Level-1" User Mode is "50 Conductive Tones" (targets can be 50 tones depending on their CO reading).
If you wish to hear less tones while coin shooting but still recognize responses from various types of coins such as, for example, the US coins, then the "Combined" is your best choice.
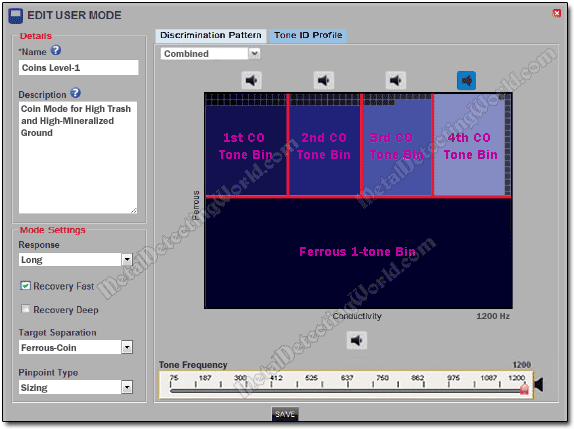
The "Combined" always consists of two modes: "1 tone FE" and "4 Conductive Tones". So, to change the current Tone ID Profile for a more complex Tone ID Map,
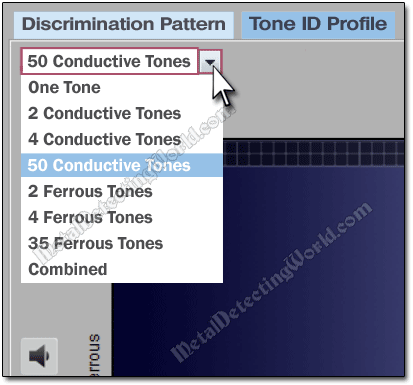
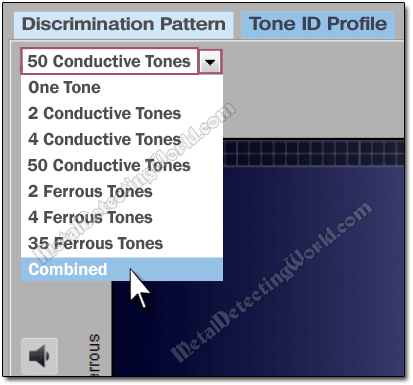
2) click on a "Drop-Down Arrow" button of the "Profile Type" Menu to open a drop-down list with eight options: ONE TONE, 2 CONDUCTIVE TONES, 4 CONDUCTIVE TONES, 50 CONDUCTIVE TONES, 2 FERROUS TONES, 4 FERROUS TONES, 35 FERROUS TONES, and COMBINED.
The current option's rectangle is highlighted with blue color, and the option's title is white as shown for the "50 Conductive Tones" option on a picture below.

3) Select "COMBINED" option (now ITS rectangle will turn blue, and the title will turn white) and click on it to choose this type of the Tone ID Profile.

NOTE: When you change the Tone ID Profile of the User Mode, both Discrimination patterns of this User Mode will have the same modified "Tone ID Map".
After you select a new option ("Combined" in this case), the menu will revert to its inactive state, displaying the selected option, and the default Tone ID Map of the COMBINED type will appear on the User Mode Editor screen:

As you may have noticed, now there are four "Play Tone" icons/buttons above the profile window, and one "Play Tone " button is below the window. The upper four "Play Tone" buttons correspond to four Conductive Tone bins - vertical rectangles, and the lower "Play Tone" button "voices out" the tone pitch of the Ferrous Tone bin - a large horizontal rectangle, at the bottom. And five different colors of the tone bins correspond to their tone pitches (all details will be given in the "How To Play and Change Tone Pitches of Tone Bins" section on page 11 of this tutorial).
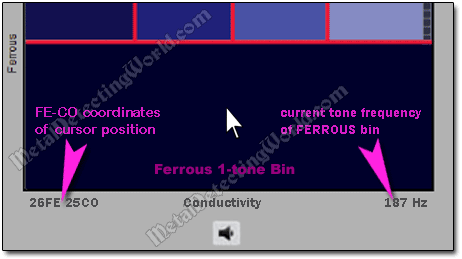
Just like on the Discrimination Pattern Editor screen, the FE-CO coordinates of the cursor's current position are displayed under the lower left corner of the Editor's Tone ID Profile window. The FE-CO numbers change in real time as you move the cursor in the window. This allows you to quickly locate required FE-CO coordinates on the Tone ID Map during editing.
Additionally a Tone Frequency value is displayed under the lower right corner of the profile window to indicate current frequency of the tone pitch corresponding to the bin in which the cursor is positioned. The frequency value also changes in real time as you move the cursor over different tone bins. Shown below is the cursor positioned at the 26FE 25CO point in the FERROUS bin which "sounds" with the 120Hz-frequency tone pitch.
