How To Use Minelab XChange 2 for EDITING - Illustrated Tutorial, page 6
Create, Edit and Save Discrimination Pattern in XChange 2
(...CONTINUED from Previous Page)
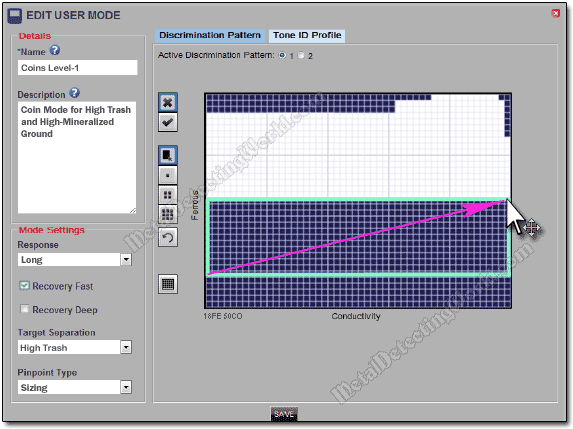
18) Drag the cursor from the 30FE-01CO point in direction (indicated by an arrow on a picture below) to the position 18FE-50CO. Actually the cursor can be placed anywhere above the FE-18 line but not below it (greater FE values), and should end up on the CO-50 line. After you complete the move, the green frame will encompass an area to be whitened:

The FE-CO values will change in real time as you drag the cursor. Because of this FE-CO coordinates indication, it is much easier to use the XChange 2 application than the CTX-3030 Control Panel to create Discrimination patterns with precision.
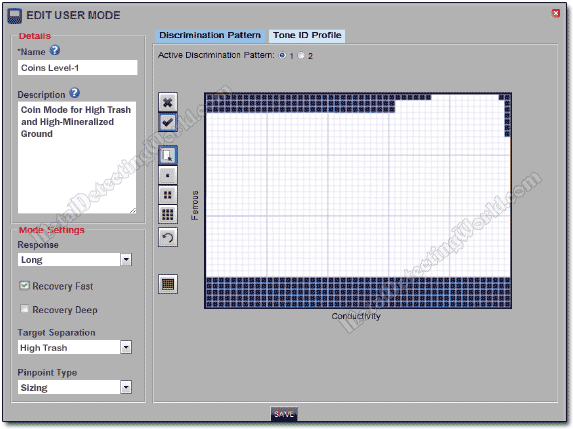
19) Release the mouse button, and the selected area turns white, and your modified Discrimination pattern will look like this:
Modified First Discrimination Pattern (P1) of Your User Mode

Everything works in the opposite way if you use the "Mask" button ![]() to add more blackened areas to the Discrimination pattern.
to add more blackened areas to the Discrimination pattern.
20) Save your work by clicking on the "Save" button ![]() located at the bottom of the User Mode Editor.
located at the bottom of the User Mode Editor.
This is all to it!
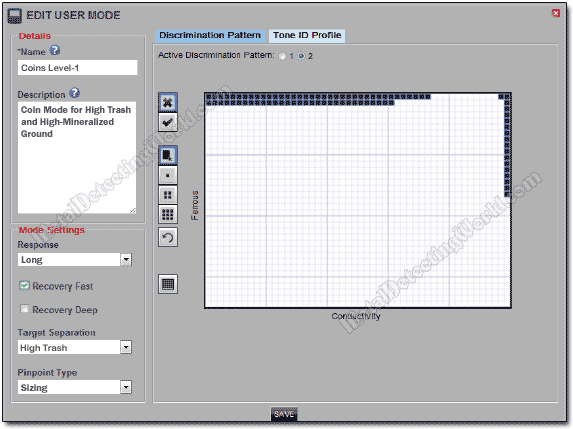
For creating or editing the Second Discrimination pattern, click on the radio button for option 2 next to Active Discrimination Pattern to select the Second Discrimination pattern for editing:

Then you repeat Steps 12 - 17 of this tutorial to create the Second Discrimination pattern that will serve as an auxiliary pattern to the First pattern of the current User Mode. It may look like the pattern shown below, which I created for the Level-1 program settings of my COINS Program #1.

If you still need two more Discrimination patterns to achieve higher efficiency in target analysis, you need to create a new User Mode (this procedure is described on page 3 of this tutorial) incorporating a different Tone ID Profile according to your needs and preferences.