How To Use Minelab XChange 2 for EDITING - Illustrated Tutorial, page 5
Create Reject/Accept Areas in Discrimination Patterns with XChange 2
(...CONTINUED from Previous Page)
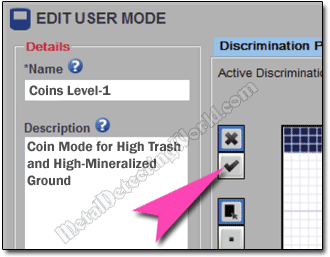
13) Click option 1 next to "Active Discrimination Pattern" to select the pattern you wish to edit. Only two Discrimination patterns, P1 and P2, can be used in each User Mode. And this is the 1st Discrimination pattern (P1) which is active now as indicated by the highlighted radio button:

14) Click on the "Active" (accepted area) button ![]() located to the left of the pattern window to whiten a certain segments in dark (rejected) areas of the Discrimination pattern, or to make the entire pattern area white (accepting everything).
located to the left of the pattern window to whiten a certain segments in dark (rejected) areas of the Discrimination pattern, or to make the entire pattern area white (accepting everything).

Now the "Active" button will be blue-outlined. To edit small and sophisticated areas, you should use the following "Brush Size" buttons: ![]() - "Small Brush" button,
- "Small Brush" button, ![]() - "Medium Brush" button, and
- "Medium Brush" button, and ![]() - "Large Brush" button. Using these buttons is easy and, therefore, is not covered in this tutorial.
- "Large Brush" button. Using these buttons is easy and, therefore, is not covered in this tutorial.
15) Click on the "Area Fill" button ![]() (located below the "Active" button) which will be also blue-outlined and change its appearance. This button enables a tool that allows you to create rectangular selections, and a selection border is dragged from its border. So you place a cursor at the corner of the rectangular area you want to whiten, click and hold down the mouse button while dragging the cursor over the pattern area to draw the required rectangle. As you move the cursor left or right or up and down from the starting point, the rectangular area will "expand" up to the size, height or length according to the cursor's moves.
(located below the "Active" button) which will be also blue-outlined and change its appearance. This button enables a tool that allows you to create rectangular selections, and a selection border is dragged from its border. So you place a cursor at the corner of the rectangular area you want to whiten, click and hold down the mouse button while dragging the cursor over the pattern area to draw the required rectangle. As you move the cursor left or right or up and down from the starting point, the rectangular area will "expand" up to the size, height or length according to the cursor's moves.
For example, if you want to reduce the rejected area in the FERROUS section, lying between the FE-18 and FE-35 lines, by half and have it extend from 31FE to 35FE,
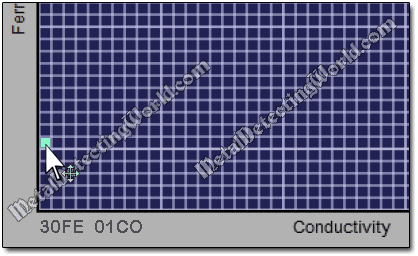
16) place the pointer (cursor) at the left edge (the CO-01 line) of the pattern - at the FE-30 point. The 30Fe-01Co coordinates of this point will be displayed under the lower left corner of the pattern window accordingly.

17) Click and hold down the button on the mouse to drag the cursor.