XP Deus Program Settings, Features and Modes Explained, page 15
NON-MOTION Mode of Operation: Function and Applications

Non-Motion modes (Page 21 in User's Manual) provide the Deus' deepest detecting range, especially when the metal detector is operated in the Non-Motion All Metal mode because no Discriminate filtering is involved, and ALL metal targets are accepted.
The Non-Motion mode of operation does not require movement of a search coil to indicate a target under it. As the coil is moved closer to the target, the metal detector's CONTINUOUS response to it intensifies in volume.
For instance, a signal of maximum strength would be blasting off when the coil is held motionless right over a shallow target. This is why the Deus' Non-Motion feature includes a Pinpoint mode (without Conventional Discrimination) which is used for determining exact locations of detected targets. Other three Non-Motion modes of the XP Deus are Non-Motion Disc, Non-Motion Audio Disc and Non-Motion AM (All Metal) described on the following pages.
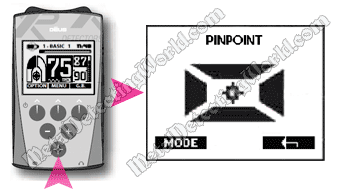
The Non-Motion mode of operation is accessed by pressing the Pinpoint push-button on the XP Deus' remote controller, and the Pinpoint Mode is the first mode to appear.
How To Pinpoint Targets with XP Deus
Pinpointing targets in the Pinpoint mode is based on a common pinpointing technique used for the Double-D search coils.
- 1) Position a search coil 1 to 2 inches (2 to 5 cm) off the ground and to the side of a detected target over the target-free spot, and press the Pinpoint push-button to calibrate the audio Threshold.
- 2) Move the search coil across the target spot. The loudest sound will indicate the target location. Make a mental note of this spot (if necessary, mark the ground) and keep the coil on it.
- 3) Move a quarter turn around the first spot and sweep the coil at 90° to the first sweep until you get the loudest sound. The detected target location will be at the intersection of these two sweeps.
More details and information on target pinpointing techniques with a double-d search coil are given in my article: Target Pinpointing Techniques.
DETUNING During Target Pinpointing
Detuning is used when it is necessary to narrow the field of detection during target pinpointing, and to determine the exact target location, especially during target recovery on manicured lawns.
- The Detuning procedure consists of the following steps:
- 1) Position a search coil very close to a detected target but not over it.
- 2) Press the Pinpoint push-button to re-tune the audio Threshold.
- 3) Repeat the above-described steps 2 and 3 of Target Pinpointing.
I do not use the Pinpoint mode for three reasons: 1) the Deus' Pinpoint mode is useless for both the small-size targets (like the tiny hammereds) and deep coin-size objects, 2) I am used to pinpointing targets without using the Pinpoint mode, i.e. pinpointing in a regular Motion mode of operation, and 3) the Deus' sharp audio (if the XP WS-4 or WS-5 headphones are used) allows for pinpointing targets in the Motion mode of operation as described below.
Pinpointing A Target Using Crossed Sweeps in Motion Mode
If you are having trouble locating a detected target with the Pinpoint mode, or you do not have to worry about sizes of holes you dig (and cover) during target recovery, you can easily pinpoint targets in a Motion mode of operation. The pinpointing procedure in the Motion mode resembles the normal Target Pinpointing procedure and consists of these two steps:
<- 1) Once your metal detector indicated the approximate spot of the detected target, sweep a search coil in the west-east (left-right) direction using only very short spans to obtain the best two-way repeatable audio response, and make a mental note of this spot (if necessary, draw a north-south line through this spot on the ground).
- 2) While "wiggling" the coil (this procedure is very similar to the "Coil Wiggling" technique described on this page) over the signal, as if "locking" on it, move a quarter turn around the target spot and keep wiggling the coil at 90° to the previous direction of sweeps until you obtain the best audio response again. If necessary, draw a line through this spot on the ground too. The location of the detected target will be at the intersection of these two sweep directions or drawn lines.
- You can approach a target spot with the search coil from as many different directions as needed, just make sure you sweep the coil in the left-right directions only. Do not wiggle the coil in the "toe-to-heel" directions.