Garrett Pro-Pointer Pinpointer
Practical Operational Tips and Techniques, page 4
(...CONTINUED from Previous Page)
Tip #2 (Spin Pinpointer Technique):
If the Pro-Pointer is beeping inside the dug hole, and you can not locate a target, just spin the pinpointer while holding it in a vertical position. If it stops "chirping", the target is on the wall of the hole. Side-scan the wall to get close to the target and then use the pinpointer's tip to locate the target's exact spot as described in my Tip #1 on a previous page.
Tip #3:
To gain the most detecting range of your pinpointer, hold the tip in the air while turning the unit on.
Tip #4:
If you metal detect on the highly mineralized ground, the mineral content can make the pinpointer sound off. To "ground balance" the unit, stick the pinpointer's tip into a pile of dirt that you have just removed from the dug hole, and turn the pinpointer on. This will desensitize the Pro-Pointer to the ground minerals, and the unit will be quiet until it gets closer to a sought target.
The detuning technique also works well during pinpointing targets in wet sand on sea and ocean beaches. In most cases, the salt minerals will make the pinpointer go off immediately when there is salt water in the bottom of the dug hole.
Tip #5:
When you encounter a shallow target, you can pinpoint it with the Pro-Pointer before you dig without having to dig a big hole. Most likely you will know precisely where the target is before digging and reduce the target recovery time.
Tip #6 (Junk Detuning Technique):
I find this technique quite impractical and never use it, but you may want to try it and see if it is suitable for the type of metal detecting you do. If you do not want to pinpoint unwanted targets that may happen to be near a desirable target, you can simply detune the Pro-Pointer to them. Detuning is described in my Tip #1.
For example, you can detune the pinpointer to nails while recovering coins at the nail-infested hunt site. However, you may get negative results as this technique is the "Catch-22": if a coin is under or behind the nail (in the hole's wall), the desensitized pinpointer would not indicate a coin that is smaller than a nail, i.e. you will not get a signal. This is why I would advise to use this technique for detuning unwanted targets with extreme caution. Or better not to use it at all.
On the contrary, this detuning technique is quite effective when used for setting less detecting range to desirable targets in order to determine their precise location as described in my Tip #1.
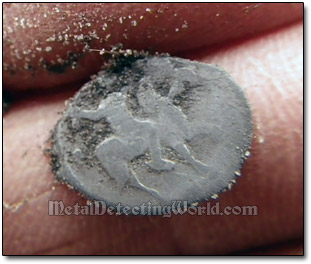
Garrett Pro-Pointer Is Quite Useful for Pinpointing Tiny Hammered Coins
Tip #7 (Depth Increasing Technique):
After all, "ignoring" unwanted targets is a metal detector's job, not the pinpointer's. The same goes for a well-known "Depth Increasing Technique" that is used to double the pinpointer's detecting range to coins. In a few words, when the pinpointer is ON, a coin is placed in the middle of the device and slowly slid towards the pinpointer's tip until the unit just barely begins to chirp. Then the coin is slid back 1/4 of an inch and kept there during the actual coin pinpointing.
Yes, now the detecting range for the coin has doubled, but what is the use for this gain in detecting range? What if an undesirable target is deeper in the dug hole's wall but gets pinpointed first, and your desirable target is closer but at a slightly different location in the wall? The worst outcome of this situation may be that you start recovering the undesirable target (e.g. a nail) and accidentally scratch the desirable target (e.g. a coin).
Besides, one must perform this technique each time one turns the pinpointer on, and the coin must be held in place! How practical is that? When one turns the pinpointer off and turns it back on again, it defaults back to its regular settings, and no additional depth is observed. To me, this technique is just a cool trick to be shown to my treasure hunting buddies over a cup of tea. :) I stick to my opinion: a metal detector must metal detect, and a pinpointer must pinpoint!
Tip #8:
Some metal detectors may go "berserk" at the hunt sites with high trash content. If your detector gets affected by abundant trash, you can use the Pro-Pointer as a mini detector. You may have to dig up a ton of trash, but when the search area is more less cleaned of superficial junk, it may be much easier to search the area using a metal detector with a small search coil. If the problem persists, it is time to upgrade to a capable metal detector.
Tip #9:
If you place the Pro-Pointer on the ground and leave it there while recovering a target, the pinpointer may start to "chirp" a little as if becoming unstable - this is normal and nothing to worry about. All you have to do is to "reset" it by turning it off and back on. If the problem persists, remove and reinstall the battery, then push the ON/OFF button and hold it for a few seconds. This resets the unit again. Then turn it off and then back on, and the Pro-Pointer should be good to go.
This is an ad by Amazon. As an Amazon Associate I earn from qualifying purchases.
You can find and compare Specifications, Features, Prices, Users' Reviews and Ratings - all helpful Information, for pinpointers designed for metal detecting on Pinpointers and Electronic Probes Reviews Page.
If you would like to point out any errors or express your opinion, please do not hesitate to send me a message!
If you would like to point out any errors or typos or express your opinion, please do not hesitate to send me a message via e-mail.