How To Clean Coins with Electrolysis - A Detailed and Illustrated Tutorial, page 17
4. Process of Coin Electrolysis
1) How To Start Electrolysis Process
By now you have made sure that everything is in place and attached. Plug in your power supply, turn it on (on the battery charger: set amperage at 1 A, voltage - at 24V), and observe any action at the coin to be cleaned. In a few seconds, if you see hydrogen bubbles emerging off the coin's surface, it means that the electronic circuit is completed, and dc current is flowing through the electrolytic cell.
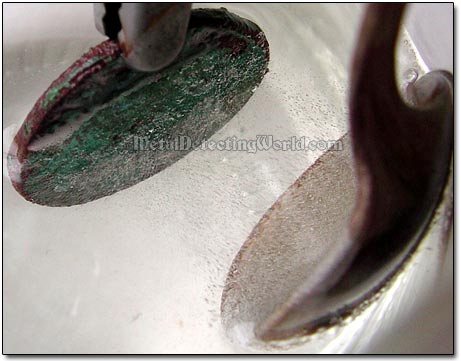
Bubbles Appear on Both Anode and Coin of "Classic" Electrolytic Cell
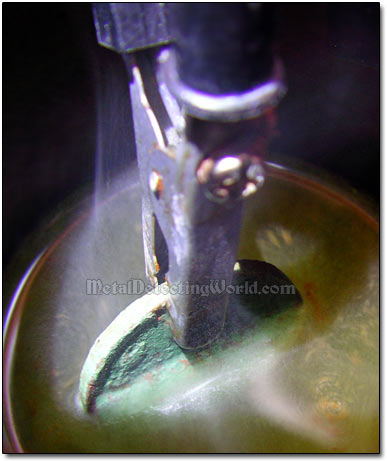
Intense Bubbling and Vapor of Hydrogen and Oxygen Takes Place in "Pipe" Electrolytic Cell
2) Troubleshooting at Starting Point
If nothing is happening, you better put the rubber gloves on (and do it every time you approach your setup from this moment on), or put one of your hands behind your back (better to get the gloves though), because now you will be "cranking" your electrolysis machine while the power is on.
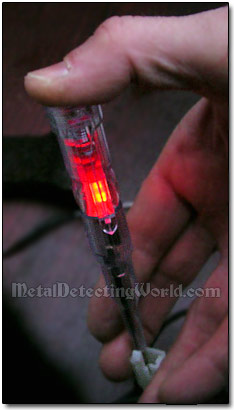
Neon Screwdriver Test Light in Use
Increase the amperage to 5 amps, and slightly wiggle the cathodic power clip until you get a spark. Try to press the clip's jaws together at this spot on the coin until the sparking triggers the process, and the electrolytic cell "comes to life" - the bubbles can be observed on both the anode and the coin. Reduce the amperage to 1 amp. The ammeter reading should not be below 500 amps. Now the wire connections will not overheat. As there has been an action observed at the cathode, the anode 1 is obviously working fine.
If you do not see any sparks or bubbling emerging from the anode or the coin, first disconnect an alligator clip from the anode and place the clip in electrolyte for a second. If you see oxygen bubbles starting to come off, connect the clip back to the anode and wiggle it the same way as you did with the cathodic alligator clip until a good contact is established. And if you see the same "happy" action on the coin, congrats - the system is working!
In case you do not observe any bubbling at either cathode and the coin, there are two things that might cause it: 1) the electrolyte is too weak, and 2) the electrode connections are poor. Turn off (unplug) the power source (AC/DC adapter or battery charger). Add a tea spoon of baking (or washing) soda into the electrolyte and stir well. Turn the power source back on and see what happens.
If the problem persists, turn the power source off, and check all setup electrical connections using a neon screwdriver test light - it is pretty easy to do, just read the instructions. Most likely a better contact is required at the cathode-to-coin connecting point. Make sure the alligator clip is touching the coin's bare metal. You may have to remove a little of the corrosion to get to the bare metal (see details on previous page).
After you start up the process, it would be ok to leave the setup and relax for 10 minutes. Then it will be necessary to get back to it and check on a few important things.
3) Attend Electrolytic Cell
First of all, do not leave the process unsupervised for too long. Second, keep an eye on changes that are happening on the coin's surface. Each five minutes, unplug the power source, take the coin out and brush it with a soft toothbrush and toothpaste under running water to remove loosened corrosion. Then rinse it in distilled water.
If the results of cleaning are satisfactory, proceed with coin preservation procedures described on page 19. If the coin needs more electrolytic cleaning, change the electrolyte in the jar, put the coin back into the solution, and resume the process of electrolysis. You may have to repeat these steps several times for heavily encrusted coins.
4) Maintain a Proper Level of Electrolyte
If the electrolytic cleaning session goes on for a long while, the electrolyte's level will noticeably drop as the water is split into oxygen and hydrogen at a steady rate. To bring the electrolyte up to a required level, ADD only DISTILLED WATER, not the electrolyte itself! Adding more electrolyte will increase the electrolyte's concentration which may lead to adverse effects on the coin and affect the cleaning process or disrupt it if the power source gets overheated.
The electrolytic solution might quickly get nasty and discolored as any substances, besides baking or washing soda, that get into the electrolyte from water (if it is not distilled), anode, cathode, and coins, will gradually contaminate the solution and build up a mess in the jar. When the solution gets very dirty, replace it with fresh one.