Electrolytic Removal of Rust - A Detailed Illustrated Tutorial, page 31
7. How To Set Up Multiple-Part Electrolysis
Multiple-part electrolysis is very practical when many small iron objects, or a few medium-sized ones, are to be de-rusted. A multi-relic electrolytic setup allows to save lots of time and electricity.
The same principles and techniques that I describe in the preceding chapters apply to the multi-part electrolytic de-rusting. Just a few additional components of the multi-part setup make it different from the regular setup.
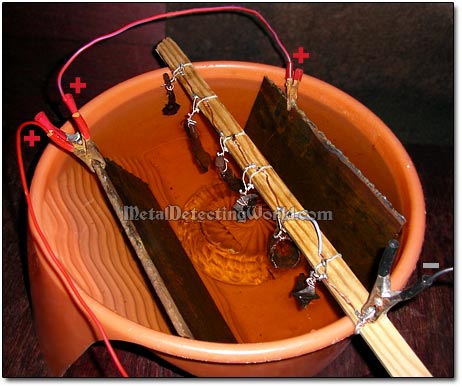
First, a large-sized container or a vat should be used for electrolytic bath. Since I am going to de-rust six small items at a time, I am going to use a plastic washing basin that is normally used for pre-wash clothes soaking, and which I usually use for the one-piece electrolysis.
This basin is large enough even for a few medium-sized artifacts.
Using a Plastic Washing Basin for Simple Multiple-Part Electrolytic Setup

The most important component of the multi-part electrolytic setup is a "hanger" to which all iron objects could be attached, and from which they could be suspended into the electrolyte. The hanger's construction must ensure that all the iron parts to be de-rusted are electrically connected together; thus, forming one big cathode or an electrical grid which will be connected to a negative power clamp of the power supply (car battery charger) and distribute electric current to all artifacts.
Using Improvised Artifact Hanger for Simple Multiple-Part Electrolytic Setup
There are two ways of setting up a grid: 1) by attaching the objects to a flexible length of thick bare wire which would be a part of the cathode and would hang across the container, or 2) by attaching the objects to a solid non-conductive hanger like a wooden lath or a plastic pipe that would be placed across the vat. I prefer and recommend to use the wood lath, which will provide total immobility of the grid during electrolysis; thus, preventing any accidental contact between the iron parts and anodes, therefore, making the multi-part setup safer.
1) Making a Multiple-Artifact "Hanger"
Before constructing my setup for the multi-part electrolysis, I selected a few pieces of aluminum wire of the same gauge from a pile of metal junk I dug up while metal detecting. Cleaning the aluminum wire is easy: just brush the dirt off under running tap water.
Dug Pieces of Aluminum Wire I Used for My Project
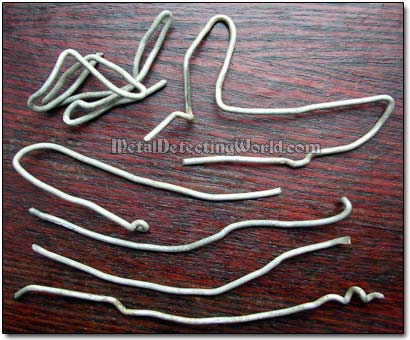
Using a set of pliers, I straightened the wire fragments, out of which I cut six pieces of the same length - 3.5 inches, using a set of side cutters. Now the aluminum pieces were ready to be made into six loops with pegs, or hooks. Each hook is strong enough to retain its shape when a heavy iron part is suspended from it into electrolyte. Each loop will be affixed onto the wooden lath.
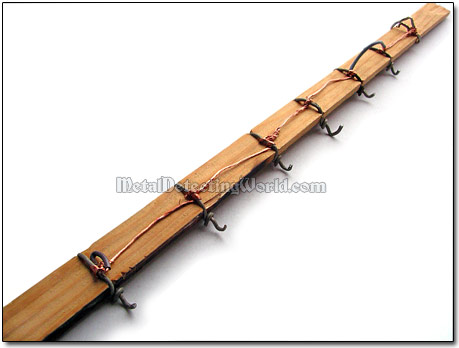
To construct the multiple-part hanger, I used a wooden lath which measures 1.6 ft long, 1 inch wide, and 0.5 inch thick. I knifed tiny notches at six points which I have marked at equal intervals on the lath. These notches would keep the aluminum wire loops from sliding back and forth on the lath. I set each loop in its notched location and tighten the loop by twisting the loop's ends, but leaving one end straight. And then I bent each straight end into a hook using a set of bent nose pliers.
I used the 12-gauge bare copper wire for all wire components - the "main" wire and six wire cathodes, of the electrical grid. For the main wire, I cut a length that was equal to the length of the wooden lath - 1.6 ft. I connected all aluminum loops with the main wire, making sure that it was tightly wound around each loop at the contact point.
Aluminum Loops with Pegs Are All Connected with "Main" Wire
To make the cathode wires, I cut six pieces of 4-6 inches in length. Each cathode wire would serve two purposes: to deliver dc current from the main wire to the iron relic, and to attach the relic to the aluminum peg.
Six Wire Electrodes Before Being Attached To Main Wire
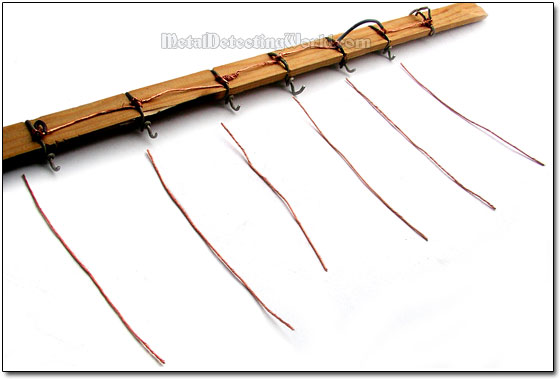
Then I attached each wire cathode to the main wire and to the aluminum hook, making sure that I would have enough length for attaching the relic at another end.
Wire Electrodes/Suspenders Are Attached to Pegs and Main Wire Forming "Cathode" Grid

Now I could either attach the iron pieces to the hanger and start the process, or improve the grid design to make it long-lasting. If one needs to run the multi-part electrolysis just once or twice, no further modification is necessary. On a picture below, you can see how the iron relics are connected to the multi-part hanger and...
Iron Relics Are Attached to Cathodes/Suspenders (Cathode Grid Is Not Soldered)
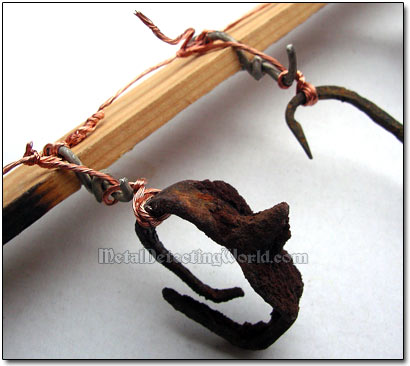
...you can skip the "Soldering" section on next two pages and continue to the "Attaching and Suspending Iron Parts" section on page 34.