Electrolytic Removal of Rust - a Detailed Illustrated Tutorial, page 22
4. How To Start Up The Process of Electrolysis
A Simple Electrolytic Setup for Removing Rust Is Ready for Action!
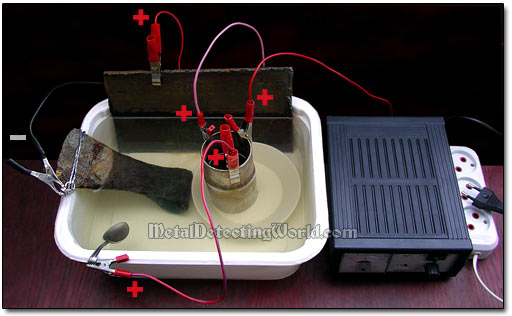
By now you have made sure that everything is in place and attached. Set your battery charger to the 24 volt range, and set the ammeter control knob in a medium position. Plug in your car battery charger, turn it on, and observe any action at the iron piece to be derusted. In a few seconds, if you see hydrogen bubbles emerging off the iron object's surface, it means that the electronic circuit is completed, and dc current is flowing through the electrolytic system.
Hydrogen Bubbles Appear on Iron Artifact

If nothing is happening, you better put the rubber gloves on (and do it every time you approach your setup from this moment on), or put one of your hands behind your back (better to get the gloves though), because now you will be "cranking the engine" while the power is on.
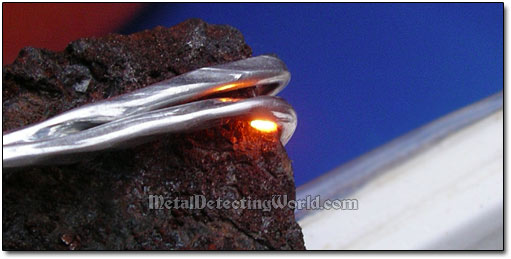
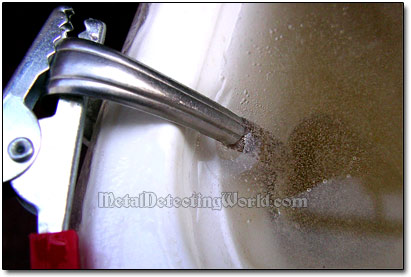
Slightly wiggle the cathode wire which is wound around the iron object until you get a spark. Try to press the wire at this spot on the iron piece until the system "comes to life", and the sparking turns into a constant glow.
Hot Contact Glowing on Cathode Wire Confirms the Process Has Started
Reduce the amperage a little - turn the ammeter knob to the left but not too much! The ammeter reading should not be below 5 amps. Now the glow is diminished, and the connections will not overheat. As there has been an action observed at the cathode, the anode 1 is obviously working fine.
Oxygen Bubbles Appear on Central Anode (#1)
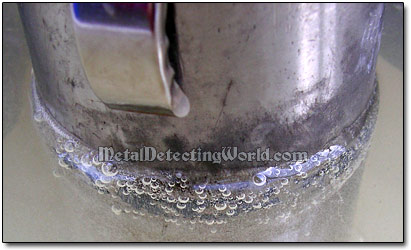
Now it is time to check on the anodes 2 and 3! Start with the anode 2. If you see the oxygen bubbles coming off the anode's surface, the anode 2 is engaged being a part of the electrolytic cell, and does not require any attention.
If you do not see bubbling emerging from the anode 2 (the mild-steel plates tend to rust, and sometimes it takes an effort to establish a good contact), first disconnect an alligator clip from the anode and place the clip in electrolyte for a second. If you see bubbles starting to come off, connect the clip back to the anode and wiggle it the same way as you did with the cathode wire until a good contact is established.
Oxygen Bubbles Appear on Anode 2
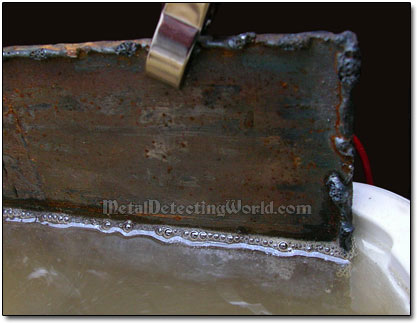
And if you see the same "happy" action on the anode 3, congrats - the system is working! (if the anode 3 is stainless, it will always work due to a solid metal-to-metal contact with the stainless anode 1.)
And now you can be a "happy camper" because "cranking" the electrolytic system is usually a big pain in one place.
Oxygen Bubbles Appear on Anode 3
In case you do not observe any bubbling at either cathode and anode 1, there are two things that might cause it: 1) the electrolyte is too weak, and 2) the electrode connections are poor. Turn off (unplug) the power source (battery charger). Add a tea spoon of baking (or washing) soda into the electrolyte and stir well. Turn the power source back on and see what happens.
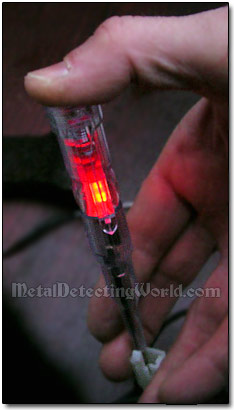
If the problem presists, turn the power source off, and check all setup connections using a neon screwdriver test light - it is pretty easy to do, just read the instructions. Most likely a better contact is required at the cathode-to-relic connecting point (see details in the "Preparing an Artifact" section on page 17).
Neon Screwdriver Test Light in Use
After you start up the process, it would be ok to leave the setup and relax for a couple of hours. Then it will be necessary to get back to it and check on a few important things.