How To Clean Coins and Jewelry with Electrolysis - An Illustrated Tutorial, page 15
Preparing Electrolytic Cell for Electrolysis
(...CONTINUED from Previous Page)
6) How To Set Up Correct Polarity
Depending on which electrode you attach the coin to, you are either cleaning the coin with electrolysis, or electrolytically plating the coin with grime. The easiest way to test which electrode you want is to submerge the two power clips, and keep them separated. Plug in the power source. The one that starts to fizz is the one to which the coin should be attached.
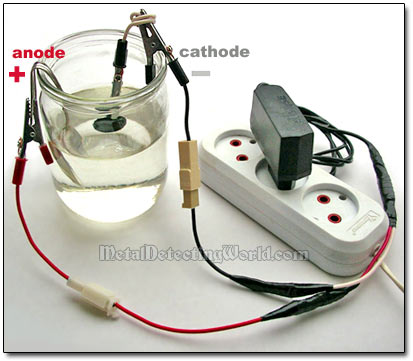
In the "Classic" electrolytic setup, attach the RED anodic (positive, "not bubbling") alligator clip to the spoon's handle (anode) which is outside the jar. Then, attach the BLACK cathodic (negative, "bubbling") alligator clip to the coin to be cleaned, suspend it, over the jar's lip opposite the spoon, into the solution, and use the two-alligator clip assembly to secure the cathode with the coin in place.
Correct Polarity in Classic Electrolysis Setup
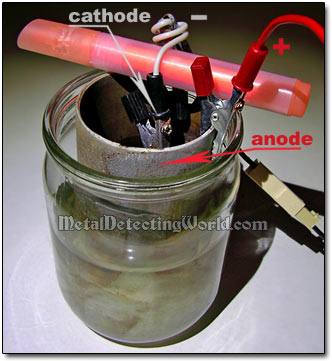
In the "Pipe" electrolytic setup, attach the red anodic alligator clip to the pipe (anode) which is inside the jar. Then, attach the black cathodic alligator clip to the coin to be cleaned, suspend it, over the crossbar (an orange marker on a photo), into the solution within the pipe, and use the two-alligator clip assembly to secure the cathode with the coin in place.
Correct Polarity in "Pipe" Electrolysis Setup
The golden rule for setting the correct polarity of any electrolytic setup is this: The POSITIVE power terminal is connected to the ANODE, and the NEGATIVE power clamp is connected to the OBJECT to be cleaned. Otherwise, you will be cleaning the waste electrode and destroying the object to be cleaned.