Rust Removal with Electrolysis - a Detailed Illustrated Tutorial, p.33
7. Multiple-Part Electrolysis Setup: Making Electrical Grid - How To Solder Wire Joints
To solder wire joints, I applied the same technique described above. The wire joint is normally harder to heat up than just a single wire, so I saturated the joint with lots of the flux or soldering rosin (the iron's tip gets "wetted" with it) for better heat transfer.
Applying Soldering Flux on Wire Joint
Applying some soldering rosin in addition to the flux would aid in getting a wire joint fully heated by the soldering iron. When you put the hot iron's tip into the rosin, the rosin would melt at the contact point, and a fair amount of it would stick to the iron tip.
Soldering Iron Gets Wetted with Rosin

Then apply the rosin-wetted iron tip to the wire joint which would start getting hot, and the rosin will transfer onto the joint. Repeat this action until the joint is saturated with rosin. Place the iron tip onto the joint, and when the joint is fully heated, apply the solder just above the tip of the soldering iron.
If the solder does not begin to melt immediately, it has to be heated more. It usually takes a few seconds to get the joint hot enough to solder. Once the solder begins to melt, it will flow off the iron tip and onto the joint. Keep the jointed wires immovable for a few seconds as the solder needs time to cool and resolidify.
Applying Solder to a Wire Joint
NOTE: If you move the wires before the solder solidifies, you will get a "cold joint". A cold joint is grainy, brittle, sometimes movable, and prone to physical failure. It also has a high resistance which can cause one or two components of the cathode grid - aluminum loops with electrodes, to fail completely - their corresponding iron artifacts would not participate in the process of electrolysis. A cold joint can also occur when not enough heat is applied to the wire joint.
To quickly add more solder onto the joint, place a tip of the solder wire right on the joint, and place the soldering iron tip at the same spot so that the iron tip would rest against both the solder and the joint, and heat up both of them simultaneously, as shown on a picture below. Continue to add solder to the wire joint until the joint is completely coated.
Adding More Solder
Wire Joint Is Coated with Solder
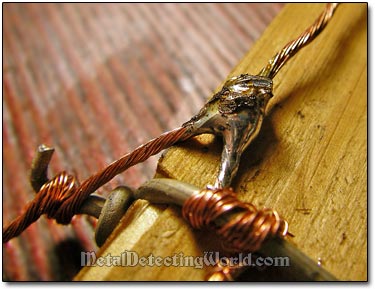
The last stage is to solder-coat the Electrode/Main Wire joints on the cathode grid. It is done the same way as described above.
Aluminum Loop, Its Hook, and Wire Electrode Are All Firmly Connected to Main Wire
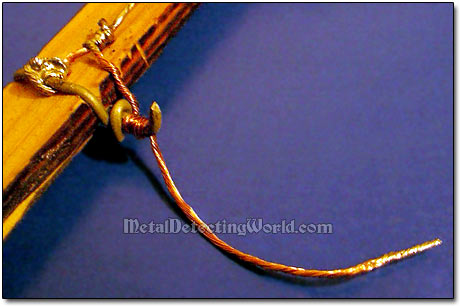
As all the electrical wire joints had been soldered, and the grid had become one big cathode, the multiple-part hanger was ready for attaching the iron artifacts to it.
Multiple-Relic Hanger with Electrical "Cathode" Grid Is Ready