Rust Removal by Electrolysis - A Detailed Illustrated Tutorial, p.10
2. How To Make a Simple Electrolysis Machine:
Basic Electrical Tools and Additional Anode Connecting Sets
3) Basic Electrical Tools, Accessories and Additional Anode Connecting Sets
To achieve maximum efficiency of the electrolytic rust removal, an iron object must be surrounded with anodes. For this, you need to make a few additional connecting sets for the anodes which you are going to use, as many as you want, and which must be connected to the positive terminal of your DC power supply.
Regular coated stranded wires of gauge 14 (1.63mm) or 12 (2.06mm) - the smaller the gauge, the larger the conductor's diameter, can be used for anode/cathode connecting sets and will be sufficient enough for the 12v/20A current to flow without overheating the power supply.
To be easily and safely identified, ALL your anode-connecting wires should be of RED color which always corresponds to POSITIVE. (for cathode (negative) connections, I use white or black wires).
You can buy wires at any auto electronics supply and hardware store, or you can cut the wires off an old turn-signal and lever assembly that can be found at any junkyard.
Old Turn-Signal and Lever Assembly

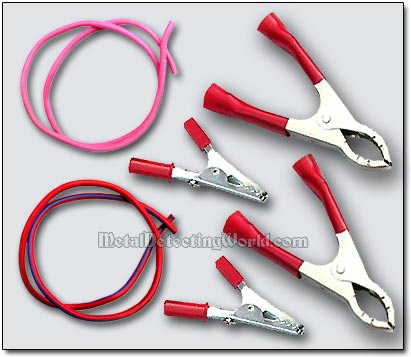
Any car battery charger is already equipped with a set of two wires/cables; each having a clamp connector that is colored accordingly. The charger's red terminal (also marked with "+") will be connected to the main anode (any anode you designate; it is better to be less-rusted or stainless) in your electrolysis setup, to which other anodes will be connected. Depending on sizes of the anodes, one can use either alligator clips or battery clamps with insulated handles to ensure strong connections.
Alligator Clips and Battery Clamps, and Red Plastic Coated Stranded Wires for Anode Connections
 1) While making an electrolysis setup, clamp the anode connector on a part of your anode that protrudes out of the electrolyte solution, or your connector will disintegrate rapidly during the process.
2) Do not use copper clips because, if accidentally immersed, they will contribute copper through electroplating onto the iron relic. Make sure that all connections are immovable (see details in the "Placing Electrodes in Electrolyte Properly" on page 19).
3) Every once in a while clean the connectors, especially at the top ends, from rust and/or oxidation to maintain a good electrical contact. This can be easily done with sandpaper instead of chemical cleaning.
TOOLS FOR ELECTRICAL WIRING
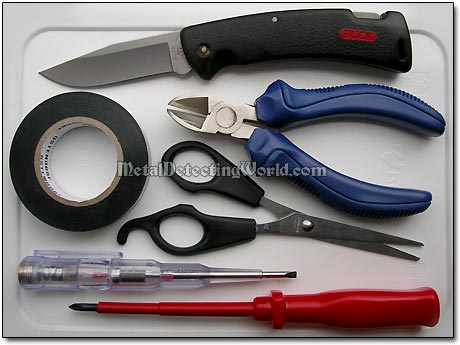
It does not take special skills in electrical wiring to make additional connecting sets, but one needs certain tools for accomplishing this task. For this project, I used the following tools and accessories:
1) Sharp Pocket Knife is used simply for splitting the wire casing, and sliding plastic coating/insulation off the wires (if a wire stripper is not available).
2) Side Cutters with a Crimp-On Part (between handles), also called side snips, are used for cutting both electrical wires and their terminals stripped of insulation, and for crimping wires.
3) Electrical Tape is used for insulating the spliced wires to avoid accidental short-circuiting.
4) A Pair of Scissors is used for cutting whatever.
5) Philips Screwdriver is used for securing the wire on the alligator clips.
6) One-Contact Neon-Lamp Tester Screwdriver (optional) - This wire-continuity tester is used to determine if an electrical path can be established between two points, i.e. if an electronic circuit can be made. The circuit under test must be completely de-energized prior to connecting the device. Please read the instructions carefully before using this electrician's tool.
Tools for Electrical Wiring
I did not include another electrician tool - wire stripper, because removing insulation from the cut end of an insulated wire can be easily done with a sharp pocket knife (as shown on next page). However, some people may argue that stripping insulation with a pocket knife may result in nicked wire, and they are right, but having a few nicked wires is not really crucial for this project. And since I have done wire stripping without difficulty since I was a kid, I just did not want to waste any more time looking for a wire stripper.
Wire Stripper
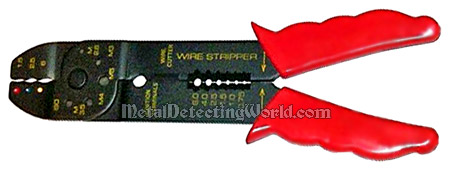
In case you need it, the wire stripper can be bought at auto supply and hardware stores. Some strippers are designed for SAE (Society of Automotive Engineers) wire, which is about 10% smaller than AWG (American Wire Gauge). So if you use these wire strippers on AWG wire, they would nick it. But, again, this is not critical for our make-electrolysis-device project, and only if you want everything to be perfect, be sure the wire stripper you buy is intended for AWG wire.
This is an ad by Amazon. As an Amazon Associate I earn from qualifying purchases.