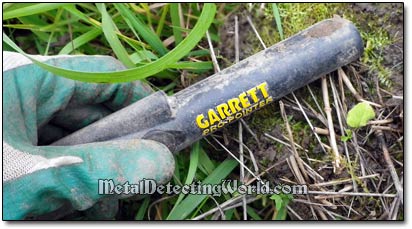
Garrett Pro-Pointer Pinpointer
Practical Trouble Shooting, Lost-Preventing and Operational Tips, page 3
(...CONTINUED from Previous Page)
Tip #2:
Being under excitement of finding a nice "keeper", almost every user of a pinpointer forgetfully leaves the device once or twice at the target recovery spot. Some are lucky to remember about their important instrument right after walking from the spot to which they return immediately and pick up the unit. Some realize that their pinpointer is missing only after they have zigzagged through the grass-overgrown meadow for some time, and there is no way they can retrace their steps to the spot.
To avoid such an unpleasant experience, develop a habit of turning the pinpointer off and putting it back in its sheath (not on the ground!) right after you got a target in your hand. If necessary, practice it over and over so that at least a long-term muscle memory is created for that task, eventually allowing it to be performed without conscious effort.
If that is somewhat difficult to do in the beginning, wind a few layers of red or orange 3M Pro Vinyl Electrical Tape around the pinpointer's body, over the speaker opening for better waterproof (see my Tip #1), so it would make it easier to find in the grass (plowed ground, snow). If you feel that you still are not on the safe side, attach a strong lanyard of a reasonable length to the pinpointer - bind it to that electrical tape, and tie another end to your pouch or the pinpointer's sheath. This way, you will never accidentally abandon your pinpointer near the spot of target recovery or forgetfully leave it at home.
Some enthusiasts manage to lose their pinpointers even when the units are sheathed! It is hard to imagine what a person have to do, maybe a dozen of cartwheels or summersaults while being ecstatic over his/her finds, to let the pinpointer drop out of its sheath. The Garrett Pro-Pointer sheath has a well-thought-out design: it is tight enough to hold the pinpointer when it is turned upside down but the pinpointer can be removed with a pull of two fingers on the unit.
Tip #3:
Sometimes the battery gets loose for some reason and may break a contact terminal while moving inside. To avoid this and keep the pressure on the contacts, a piece of foam should be put between the cap and the battery.
Tip #4:
If you dropped you pinpointer on the concrete, and the vibrate target indication stopped working, you may want to disassemble the Pro-Pointer and put a little motor with a counterbalance back in its clip.
Tip #5:
If you are not going to use the pinpointer for a long while, do not forget to take a battery out! Otherwise, it may leak inside the unit and render it dysfunctional.
Tip #6:
To prolong the battery life, keep the pinpointer off between target recoveries. If you do so, the Pro-Pointer will run on a single battery charge for a few months. Mine has been already running on the same alkaline 9v battery for two seasons!
Practical Operational Tips:
Here are a few operational tips which may help in getting the most efficiency out of the Pro-Pointer's performance.
Tip #1 (Detuning Technique):
The Garrett Pro-Pointer is designed to enable you not only to pinpoint a target, but also to determine the target's size, depth and precise location. It is easy to ascertain all these three variables at once if you use DETUNING technique. Detuning is desensitizing threshold audio tuning which reduces the target signal width for accurate pinpointing. In other words, by detuning you can narrow the pinpointer's audio response to the target, i.e. decrease its detecting range. Every time you move the pinpointer closer to the target spot and detune, the target must be a lot closer to the pinpointer's tip before it will sound off. And finally the Pro-Pointer sounds off only when it practically touches the target.
The detuning technique is very easy to do! After you locate the target spot (where the strongest signal is) inside the dug hole, turn OFF the Garrett Pro-Pointer while holding its tip near the target spot and keeping it stationary, then turn the Pro-Pointer back ON again. Done! Now you may not get a signal unless you remove some dirt and move the tip more closer to the target. Repeat the detuning procedure until the signal stops disappearing and remains strong - the target is within millimeters of the pinpointer's tip. Carefully recover the target. If the target is positioned in the wall of the hole, first use the "spin pinpointer" technique (described in my Tip #2)
To reset the Pro-Pointer to its default setting, just turn it OFF, then ON again away from the hole and any metal. Now the pinpointer's sensitivity and detecting range is back to normal - 2-4 inches on coin-sized targets.
The detuning technique can be effectively used for locating large objects as well, especially if you need to know how deep a large object is buried. The procedure is the same: after you turn the Pro-Pointer on and locate the target spot with the strongest signal, detune the signal. If you do not get a response, the large target is buried deep. Now you start digging down to get closer to the target and get an audio response. Continue until the response stays audible and strong. This is a good way to distinguish large and DEEP targets from the large and SHALLOW targets. The Garrett Pro-Pointer can be a very useful accessorial instrument to aid a deep seeking metal detector in cache hunting.
This is an ad by Amazon. As an Amazon Associate I earn from qualifying purchases.
